Self bailer removal
Sorry for the long winded post, but it's Monday morning and I don't really want to start working yet:
The self bailer in the aft well of my DSII has been leaking for years and I have been wanting to get rid of it for a while. I've had them in a few boats over the years and never really liked the way they performed (it could be me). This weekend I finally got the self bailer out and It was way more of a chore than I had anticipated. I had assumed (and read elsewhere) that it could be removed without destructive force. Unfortunately, the boat was built in late 60's or early 70's and spent at least several years of her life next to a barn on the shore in Winter Harbor Maine. I didn't find her until the barn had collapsed on her.
The years of neglect had taken its toll on her so I resorted to my handy vibrating saw (Multimaster copy) and cut the whole thing out. What I found was that the bailer was glassed in place so no amount of twisting and pulling the bailer would have released the bailer without a saw. My guess is that one of the previous owners got fed up with the thing leaking and mixed up a batch of epoxy or polyester resin and gobbed it into the void surrounding the bailer and reinstalled.
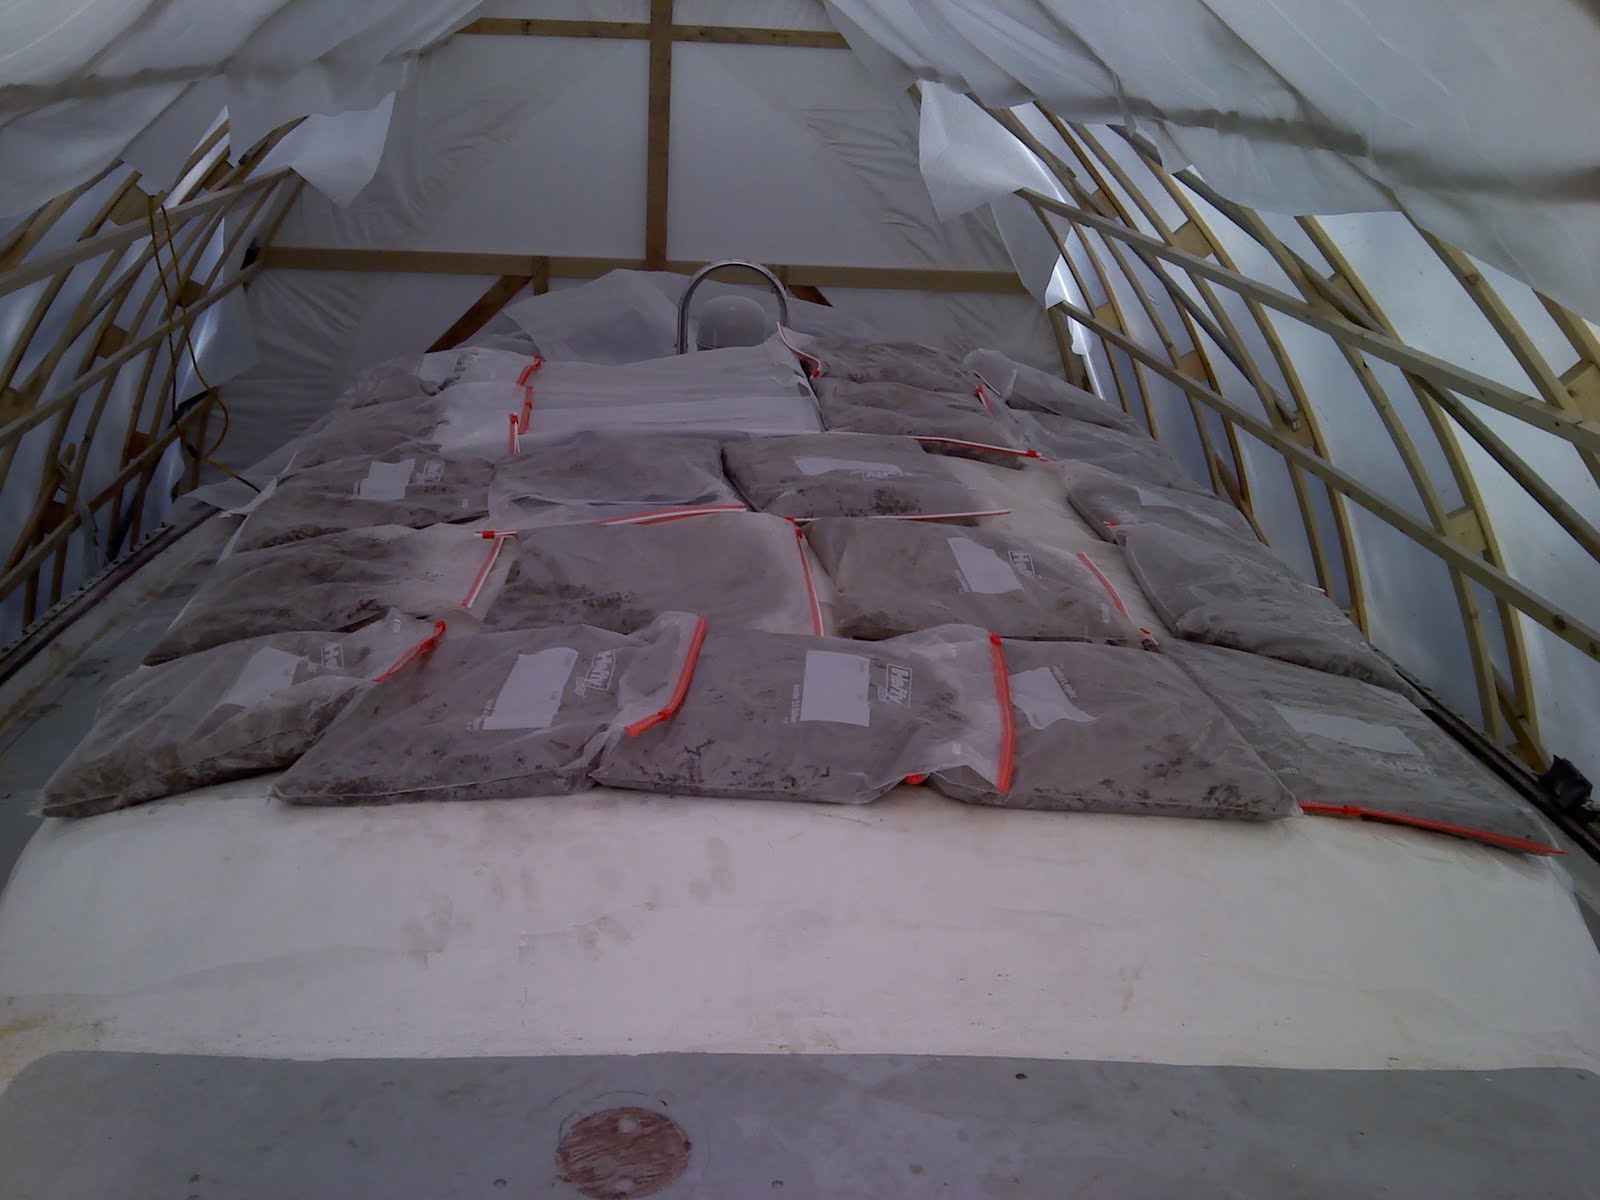
Anyway, my repair consisted of 2 epoxy jobs staggered about 3 hours apart. The first one was to fix the outer skin. I ground a 1.5 inch bevel around the hole left by the bailer, cut 2 layers of 1708 biax cloth the diameter of the bevel and 5 layers about the diameter of the hole where the bailer was (to build up the void). Then I mixed up about 6 oz of epoxy (I use System 3), wetted out the bevel on the underside and the 2 layers to go on the bottom. It's never fun epoxying upside down because the stuff tends to want to listen to gravity and fall off, but this was a small enough area (<6 inch diameter) that I was just able to cover the area up with a piece of plastic all taped to the underside with duct tape and then braced from underneath with a 2 gallon ziploc bag of sand (makes epoxy conform to shapes nicely). Once I had that braced up and in place I was able to use the rest of the epoxy to glue in the other 5 smaller pieces of biax from the top to fill in the hole left by the bailer. It all sounds much more complicated than it was.
I let that kick for a few hours and then cut out a single large piece of biax cloth to cover the entire bottom of the well where the bailer was. I did this because the well had a bunch of dings and small punctures (1/8") that I suspect was allowing water into the inner hull every time the well would fill up. Then I mixed up an 8 ounce batch of epoxy, wetted everything out place the cloth and then layed in a sheet of plastic and a few bags of sand, making sure that the sand was spread out nicely to make the cloth conform to the curves of the well.
When I came back this morning I pulled the bags and tape from the boat and found that the layup went well. Now I have to do some sanding followed by some fairing compound and another sanding and I'll have a fair hull and aft well ready for paint. I usually try to take pictures of what I do but I couldn't find my camera. If I find it today I'll post a few pics of the finished job.
The self bailer in the aft well of my DSII has been leaking for years and I have been wanting to get rid of it for a while. I've had them in a few boats over the years and never really liked the way they performed (it could be me). This weekend I finally got the self bailer out and It was way more of a chore than I had anticipated. I had assumed (and read elsewhere) that it could be removed without destructive force. Unfortunately, the boat was built in late 60's or early 70's and spent at least several years of her life next to a barn on the shore in Winter Harbor Maine. I didn't find her until the barn had collapsed on her.
The years of neglect had taken its toll on her so I resorted to my handy vibrating saw (Multimaster copy) and cut the whole thing out. What I found was that the bailer was glassed in place so no amount of twisting and pulling the bailer would have released the bailer without a saw. My guess is that one of the previous owners got fed up with the thing leaking and mixed up a batch of epoxy or polyester resin and gobbed it into the void surrounding the bailer and reinstalled.
Anyway, my repair consisted of 2 epoxy jobs staggered about 3 hours apart. The first one was to fix the outer skin. I ground a 1.5 inch bevel around the hole left by the bailer, cut 2 layers of 1708 biax cloth the diameter of the bevel and 5 layers about the diameter of the hole where the bailer was (to build up the void). Then I mixed up about 6 oz of epoxy (I use System 3), wetted out the bevel on the underside and the 2 layers to go on the bottom. It's never fun epoxying upside down because the stuff tends to want to listen to gravity and fall off, but this was a small enough area (<6 inch diameter) that I was just able to cover the area up with a piece of plastic all taped to the underside with duct tape and then braced from underneath with a 2 gallon ziploc bag of sand (makes epoxy conform to shapes nicely). Once I had that braced up and in place I was able to use the rest of the epoxy to glue in the other 5 smaller pieces of biax from the top to fill in the hole left by the bailer. It all sounds much more complicated than it was.
I let that kick for a few hours and then cut out a single large piece of biax cloth to cover the entire bottom of the well where the bailer was. I did this because the well had a bunch of dings and small punctures (1/8") that I suspect was allowing water into the inner hull every time the well would fill up. Then I mixed up an 8 ounce batch of epoxy, wetted everything out place the cloth and then layed in a sheet of plastic and a few bags of sand, making sure that the sand was spread out nicely to make the cloth conform to the curves of the well.
When I came back this morning I pulled the bags and tape from the boat and found that the layup went well. Now I have to do some sanding followed by some fairing compound and another sanding and I'll have a fair hull and aft well ready for paint. I usually try to take pictures of what I do but I couldn't find my camera. If I find it today I'll post a few pics of the finished job.